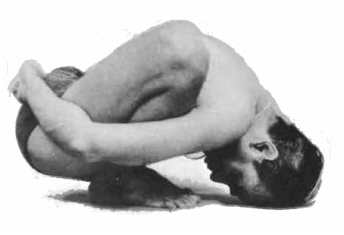
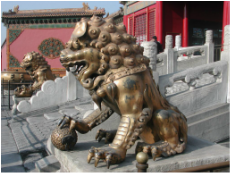
This photo shows one of my all time yoga heroes and gurus BKS Iyengar in Malasana. So this is what we are aiming at friends! However, don't worry if this seems impossible - it almost certainly is possible given time but I expect you too have more to accomplish in life than the mastery of one posture. My daughter thinks it would be better named 'Roast Chicken Pose" the way Iyengar performs it here. She has a point!
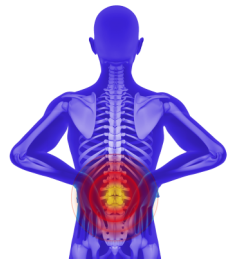
This post is all about letting you know why you might want to give Malasana a go and how it can be perfectly achievable and beneficial even for those of us not at the advanced yogi level of Sri Iyengar! The headline point is that I recommend it therapeutically very often for people with lower back pain.
So what is it?
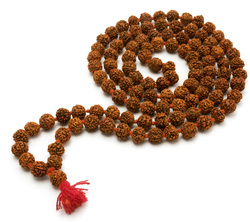
Let's start with the name. Mala means garland - like a flower garland necklace that is placed around the neck of as a blessing. Similarly, you may have seen or used Mala beads - a string of round beads, 108 in number, with the final bead and a tassel dangling down. This is the Mehru bead and once you get from there to there you will know you have recited your mantra 108 times.
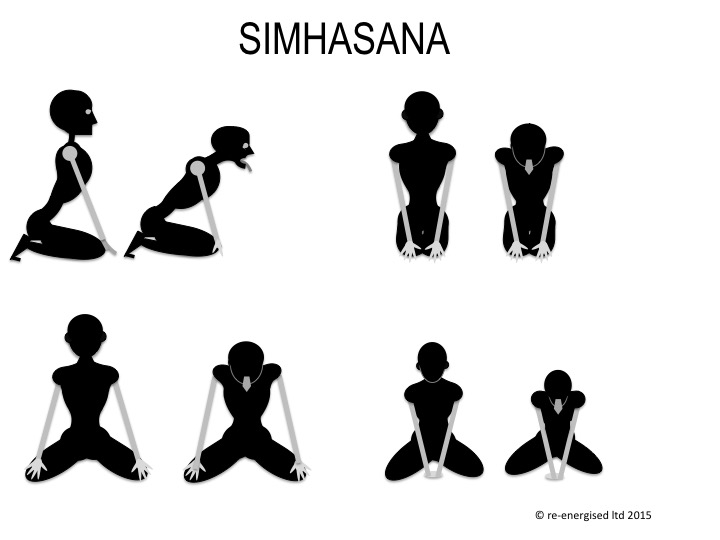
In this pose the hands are clasped behind the back and around the bent legs, garlanding the spine with the back of the heart uppermost. To get to this pose, most people tend to work up from two intermediate poses that bestow similar benefits. In fact, I rarely meet someone in class able to perform a full on malasana, so these early stage variants are the ones that tend to provide a breakthrough to those with lower back pain, IBS and menstrual cramp. The postures stretch out the muscles tilt the pelvis and stretch the tissues between the fused area of the pelvic vertebrae and the independently mobile vertebrae of the lower back. It's great for digestion, elimination and general mobility as an antidote to sitting at a desk, which tends to shorten and thereby tighten the inner thighs, groin and hip flexors.
It may look odd but this posture is hugely beneficial.
Easy Malasana Layer 1
Start with the feet wide apart. With arms outstretched to the side the heels should be under the wrists. Bend the knees and measure your stance using the palms of your hands. Two hands' length is a good starting pace and should equate to shoulders' width.
This post is all about letting you know why you might want to give Malasana a go and how it can be perfectly achievable and beneficial even for those of us not at the advanced yogi level of Sri Iyengar! The headline point is that I recommend it therapeutically very often for people with lower back pain.
So what is it?
Let's start with the name. Mala means garland - like a flower garland necklace that is placed around the neck of as a blessing. Similarly, you may have seen or used Mala beads - a string of round beads, 108 in number, with the final bead and a tassel dangling down. This is the Mehru bead and once you get from there to there you will know you have recited your mantra 108 times.
In this pose the hands are clasped behind the back and around the bent legs, garlanding the spine with the back of the heart uppermost. To get to this pose, most people tend to work up from two intermediate poses that bestow similar benefits. In fact, I rarely meet someone in class able to perform a full on malasana, so these early stage variants are the ones that tend to provide a breakthrough to those with lower back pain, IBS and menstrual cramp. The postures stretch out the muscles tilt the pelvis and stretch the tissues between the fused area of the pelvic vertebrae and the independently mobile vertebrae of the lower back. It's great for digestion, elimination and general mobility as an antidote to sitting at a desk, which tends to shorten and thereby tighten the inner thighs, groin and hip flexors.
It may look odd but this posture is hugely beneficial.
Easy Malasana Layer 1
Start with the feet wide apart. With arms outstretched to the side the heels should be under the wrists. Bend the knees and measure your stance using the palms of your hands. Two hands' length is a good starting pace and should equate to shoulders' width.
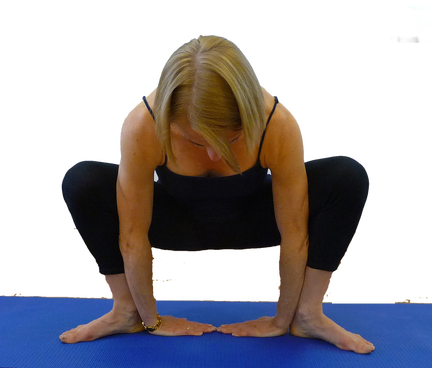
Slowly bend the elbows bringing the hands together in a prayer like position with the heels of the hands aligned with the heart area or centre of the chest.
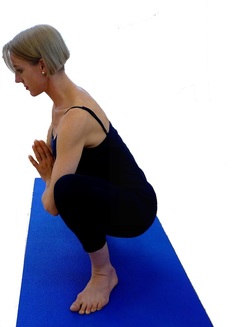
Use the elbows to direct the knees outwards but do not let the knees roll forward - strongly engage your buttocks and thighs to rotate the knees out and back over the little toes.
Spread your weight into the entire sole of the foot, so you can be deeply supported by the earth for stability.
Start with the spine leaning forward, straight but on a diagonal the slowly deepen into the seat as you exhale, keeping the knees actively rolling outwards but very consciously melting downwards, lowering the seat and drawing the spine more erect.
Remain here for a few breaths deepening into the pose then gently place the palms on the floor in front of you, pivot the feet so the toes face forward and slowly straighten the knees and return to standing. Close the feet and return to Tadasana for a moment before relaxing.
If your blood pressure tends to be high or low exit the pose with great care and slow grace breathing fully.
Malasana Layer 2.
Having measured the space between your heels, start standing, soles flat and spread wide into the floor. To begin with an optimally deep breath exhale and hold the breath out for two seconds then take a large breath in as you raise your hands to the sides as if drawing a circle until the palms meet in prayer above your head. This will help expand the rib cage lifting the torso and decompressing the lumbar spine. Let your eyes follow your hands at the top keeping the neck long and the face just gently tilted skyward.
Pressing the outside edge of the hands together leaving the soft heart of your palms apart, exhale very slowly bringing the hands to heart level whilst bending the knees. Ideally move into the full bend on the same out-breath but pause, inhale and breathe out again to go deeper if this feels right for you.
Take up to five slow breaths in the pose, deepening your seat and widening your knees with every exhalation letting go of any expectations you may have about how far or how little you may shift or what kind of sensations may occur. Many people are held back by fear in wide legged poses - imagining that they will hurt, but that is simply a mind-made barrier to feeling the wonderful sensation of slow, controlled stretching which releases endorphins, the 'happiness' neuro-peptides (the same thing that causes a high in love making).
Inhale then keeping the knees out exhale to rise back to standing. This takes some stamina to accomplish so take the option best for you today, which could be, palms to floor, feet turning to the front by pivoting on the ball of the feet while taking the body weight on the hands.
Malasana Layer 3
This development is all about the entry and exit. I like to compliment the stretching effect of Malasana with the strengthening effect of the Goddess Squat, or 'Utkata Konasana' (fierce angled pose).
To do so, start with feet apart. Raise the hands to the sides, then bend the elbows, palms front, fingertips rising skyward as you bend the knees to a wide squat. Keep the knees over the little toes and elbows directly at your sides. Check that the elbows are not creeping towards each other by looking to each side. Enter Goddess Squat on an inhalation and either exhale, then inhale before deepening into Malasana bring the hands into prayer position, or simply enter on an inhale and transition into deep malasana on the exhalation.
The same applies after Malasana, transition through Utkata Konasana.
Malasana Layer 4
This option begins with feet in Tadasana, for ladies, I recommend the feet very slightly apart to accommodate a wider pelvis. From Anjanayasana (standing feet together, hands in prayer), bend the knees on the exhalation. Place the hands on the floor in front and inhale opening the knees. Wrap the arms around and clasp them under the heels or behind the heels if your soles are fully on the floor. Bend forwards, curving the spine as if aiming to make head and tailbone meet in a full circle.
You could use a yoga wedge or half bloc for your heels, or a rolled yoga mat instead of using your own hands.
Feel the counter-pull of tail and neck reaching towards one another. This deeply stretches the back of the ribs and is a beautiful compliment to back bends. In this fully curved position, the lower back is released completely from the compression it can endure when standing or sitting.
Malasana Layer 5
Accomplished yogis and yoginis, having stabilised the heels, may now wrap the hands behind and reach the chin to the floor instead of tucking the head under. Enjoy several long, surrendering breaths here. You are bowing your heart completely to the Divine. Give everything to be opened completely by surrender and gravity working hand in hand. Reach your heart forward with purpose and intent. Progress will come in this pose from absolute love and pure willingness to be shaped by the Divine forces of the universe.
After this full expression of surrender, open out into upwards facing dog and then downwards facing dog, then hang from the hips in a forward fold for a moment, letting gravity relax your torso before you return to standing.
 RSS Feed
